
Short profile
Jan-Ole Schmidt (usually called Ole) comes from northern Germany and found his way into product management through his economics studies. With over 15 years of experience in the photography industry, including 11 years at WhiteWall, he is now a team leader in product management. As an autodidact, he has dealt intensively with the subject of photography and has built up extensive expertise, not least through his professional activities.

4 STEPS TO LARGE-FORMAT LAMINATION
with Jan-Ole Schmidt
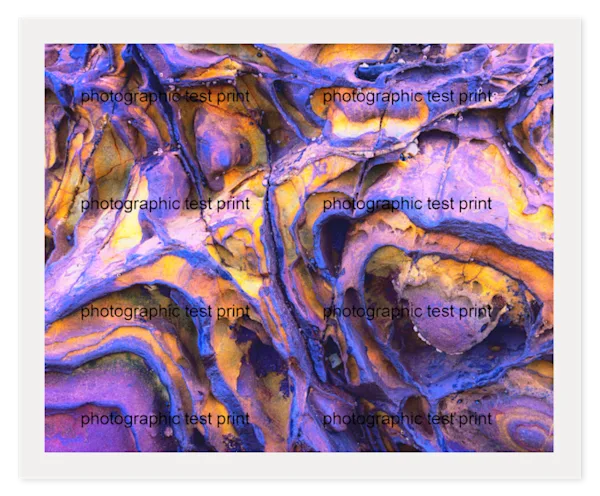
, a cave in a cooled lava flow.")
Photo: Jan-Ole Schmidt
Having a photograph professionally printed and framed as an impressive large format is an investment in lasting quality and perfection. Our colleague Jan-Ole Schmidt, WhiteWall Team Lead Product Management, uses his own photograph to explain how you can use test prints to check crucial aspects such as color and brightness reproduction as well as image sharpness and file resolution in advance.
Step 1: Upload photo

Photo: Upload your photo and try different product variants
The initial situation is that I want to have a large-format photo laminated and framed. It's a photo that I took in the north of Iceland in 2017. Grjótagjá is a cave in a cooled lava flow. It lies in the fault zone between the European and American continental plates. The water is warm due to geothermal activity and you can see the steam above the blue water further back. Among other things, this cave was used as a filming location for a scene in Game of Thrones. The photo contains some dark areas that are sensitive when printing. Here I want to check exactly whether the drawing, i.e. details in dark areas, is reproduced sufficiently. There are also fine details in the rocks and under the surface of the water. I also want to check their reproduction in advance and see whether my image sharpening matches the print size, material and output method.
It is also sensitive that there are some yellow and blue tones that are important for the overall effect of the motif. Reproducing these fine gradations and the exact color tones is therefore crucial for the motif. The rather darker overall effect is also a challenge, because if the print is only slightly too dark as a result, this can quickly create a very gloomy effect that deviates from the intended mood.
I generally start with a more playful approach to the final form in which I want to print the image. I upload the photo to the WhiteWall configurator and play around with different variants.
Step 2: Set format

Photo: Select from a large variety of frames
I set the desired format approximately to see the size dimension. This is particularly important in combination with a frame, as this appears wider in relation to smaller formats and develops a more discreet look for large formats. I then decide on a format, lamination and framing.
Various configurations can be saved for later comparison in the top right-hand corner under "Save product" and called up at any time.
Step 3: Order test strips in 1:1 scaling and original paper

Photo: A test strip in 1:1 scale helps to check resolution and sharpness.
To check the effect and quality of my file in advance, I do two things:
Firstly, I order a strip of the image in 1:1 scaling
Secondly, I order the entire photo in small format.
This strip is a section of the image that contains as many critical areas as possible. Colors, details, fine gradations and the dark background. This is then ordered in the size that this section will be in the final print. A vertical strip is therefore the same height as the final print, a horizontal strip is the same width. In this case, I use a vertical cut-out.
The framed picture should later be 120 cm high, so I order the strip in exactly this 120 cm height. The resolution of the file is 17 megapixels (5056x3377px), it's a bit older. Of course, 3377 pixels at 120 cm is not a lot, but with some viewing distance the requirement for resolution and sharpness becomes relative. So I use the test strip to see whether the details are sufficient for me at the normal viewing distance of the final format. I order this in three brightness levels (you can also start with one and then test darker or lighter in the second step), each in the standard version and in the ultraHD version, so that I can assess the effect of the sharpening. Here, too, I take advantage of the fact that the WhiteWall configurator allows me to customize the size. This means I don't have to worry about creating the strip as a file in Photoshop and, above all, I don't have to calculate the dimensions. I can also be absolutely sure that I'm using the same file for my tests and the subsequent print.
Under "Image size and cropping" -> "Custom format" I leave the height at 120 cm and select a width of 20 cm. The cropping function opens, which I use to define my image section. I now add this section directly to the shopping cart.
Step 4: Order a test print of the entire motif

Photo: A test print helps to see the actual effect of the paper on the motif
For my second test print, I order a print of the complete photo in a small format so that I can assess the brightness of the entire image on the print. It is important to use the paper of the selected lamination for the final work. Of course, it is also possible to order different paper variants. A soft proof always makes sense beforehand. This simulates the paper whiteness and color gamut and provides an initial indication. In the end, however, only a real print can give the impression of a real print. The effect of the light reflections of the paper surface and the intensity of the color reproduction can of course only be simulated to a limited extent on a backlit screen with a different surface than the paper. I often find that I want to lighten the file a little. If I only noticed this during the final framing, it would of course be frustrating.
Another tip at this point is to activate the test print function. This reduces the price of the prints, and in return a watermark is added to the image. Now I'm looking forward to my test prints, which will be ready a few days later.

Photo: Jan-Ole Schmidt carefully checks the test prints
After carefully checking the test prints and making fine adjustments to brightness and sharpness, the final image was ordered: I ultimately decided on an ultraHD photo print behind acrylic glass with the elegant Basel floater frame in white matte. I am very happy with the result.
The end result:

Photo: ultraHD photo print behind acrylic glass framed in a white Basel floater frame
Test various papers for added confidence in the colors and options of your choice by ordering your photograph (or a section of it) as a watermarked test print at a lower price. This way you can be sure that your large format work will achieve exactly the effect you desire.
Simply click ‘order test print’ in the configurator and order your custom test print to your home. This option is only available for fine art prints and photo prints.
WhiteWall Product Recommendations


Product Assortment Sample Set
The set contains samples of the most popular products from our various product categories. If you don't have any specific material in mind yet and want to make a general comparison, this set will give you an excellent overview of your options.
You will be refunded 100% of the purchase price for your samples (excl. shipping) in the form of a voucher. This will be sent to you in a separate email after the samples have been shipped and can be redeemed during your next order.
Copia fotográfica en metacrilato 2 mm
Copia fotográfica en metacrilato mate 2 mm
Impresión directa en aluminio cepillado en plata
ChromaLuxe HD Metal Print, brillo
Copia fotográfica en aluminio dibond, mate
Hahnemühle Torchon
Hahnemühle William Turner
Hahnemühle FineArt Pearl
Photo Print On Fuji Crystal DP II, Glossy
Photo Print On Fuji Crystal DP II, Matte
Photo Print On Ilford B/W Paper, Matte
Matte Canvas
You might also like these articles:
Submitted by WhiteWall Team

Finding the right Fine Art paper with Florian W. Mueller
To help you make the right choice, photographer Florian W. Müller today reveals his criteria for the perfect Fine Art paper based on three of his photo series.
Submitted by WhiteWall Team

Colors and contrasts
Colors and contrasts play a central role in photography. They influence the mood, the depth of the image and the visual impact. In this article, we will show you how to use colors and contrasts effectively to make your photos impressive and present them in the best possible way.
Submitted by WhiteWall expert Katharina Wergen

Various print media and formats
In the previous chapter, we have already explained what you should pay attention to when preparing for printing. This article from WhiteWall should now help you to get an overview of the various file formats and export options. And to understand when you should use which format - and why others are rather unsuitable for printing.